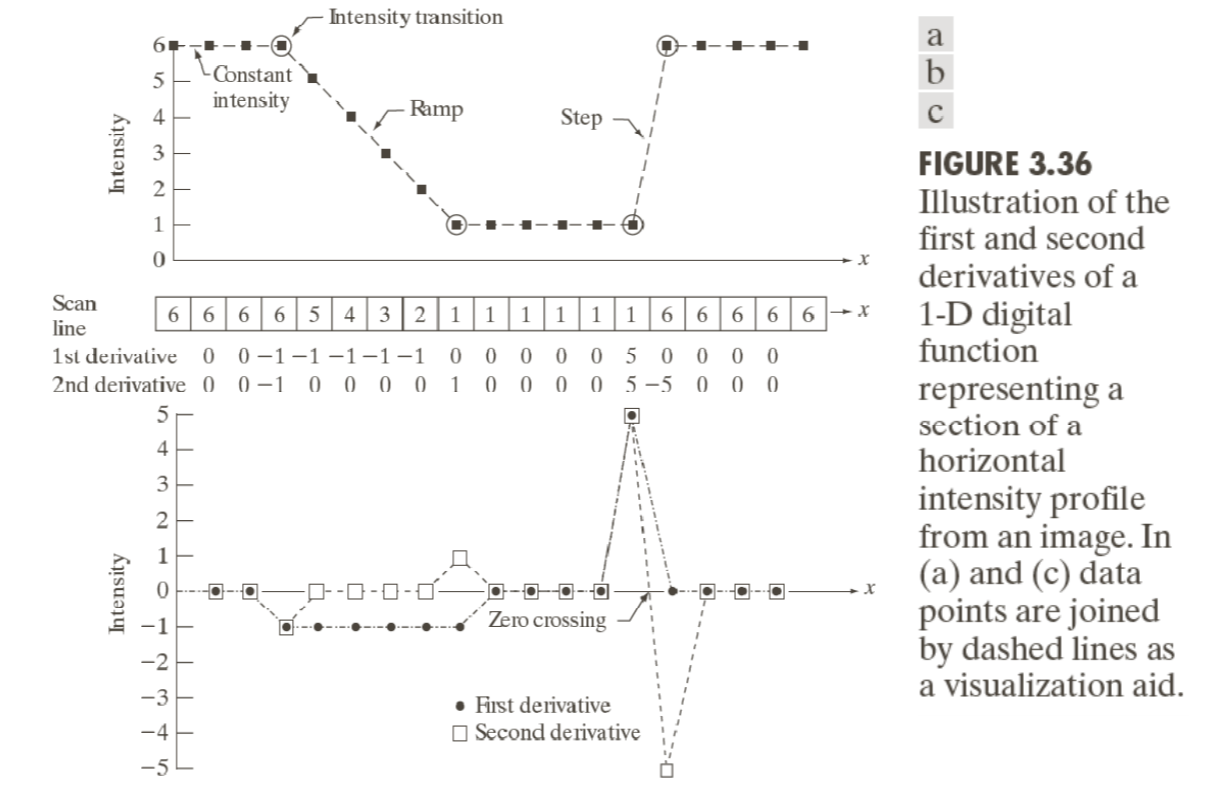
1
2
3
4
5
6
7
8
9
10
11
12
13
14
15
16
17
18
19
20
21
22
23
24
25
26
27
28
29
30
31
32
33
34
35
36
37
38
39
40
41
42
43
44
45
46
47
48
49
50
51
52
53
54
55
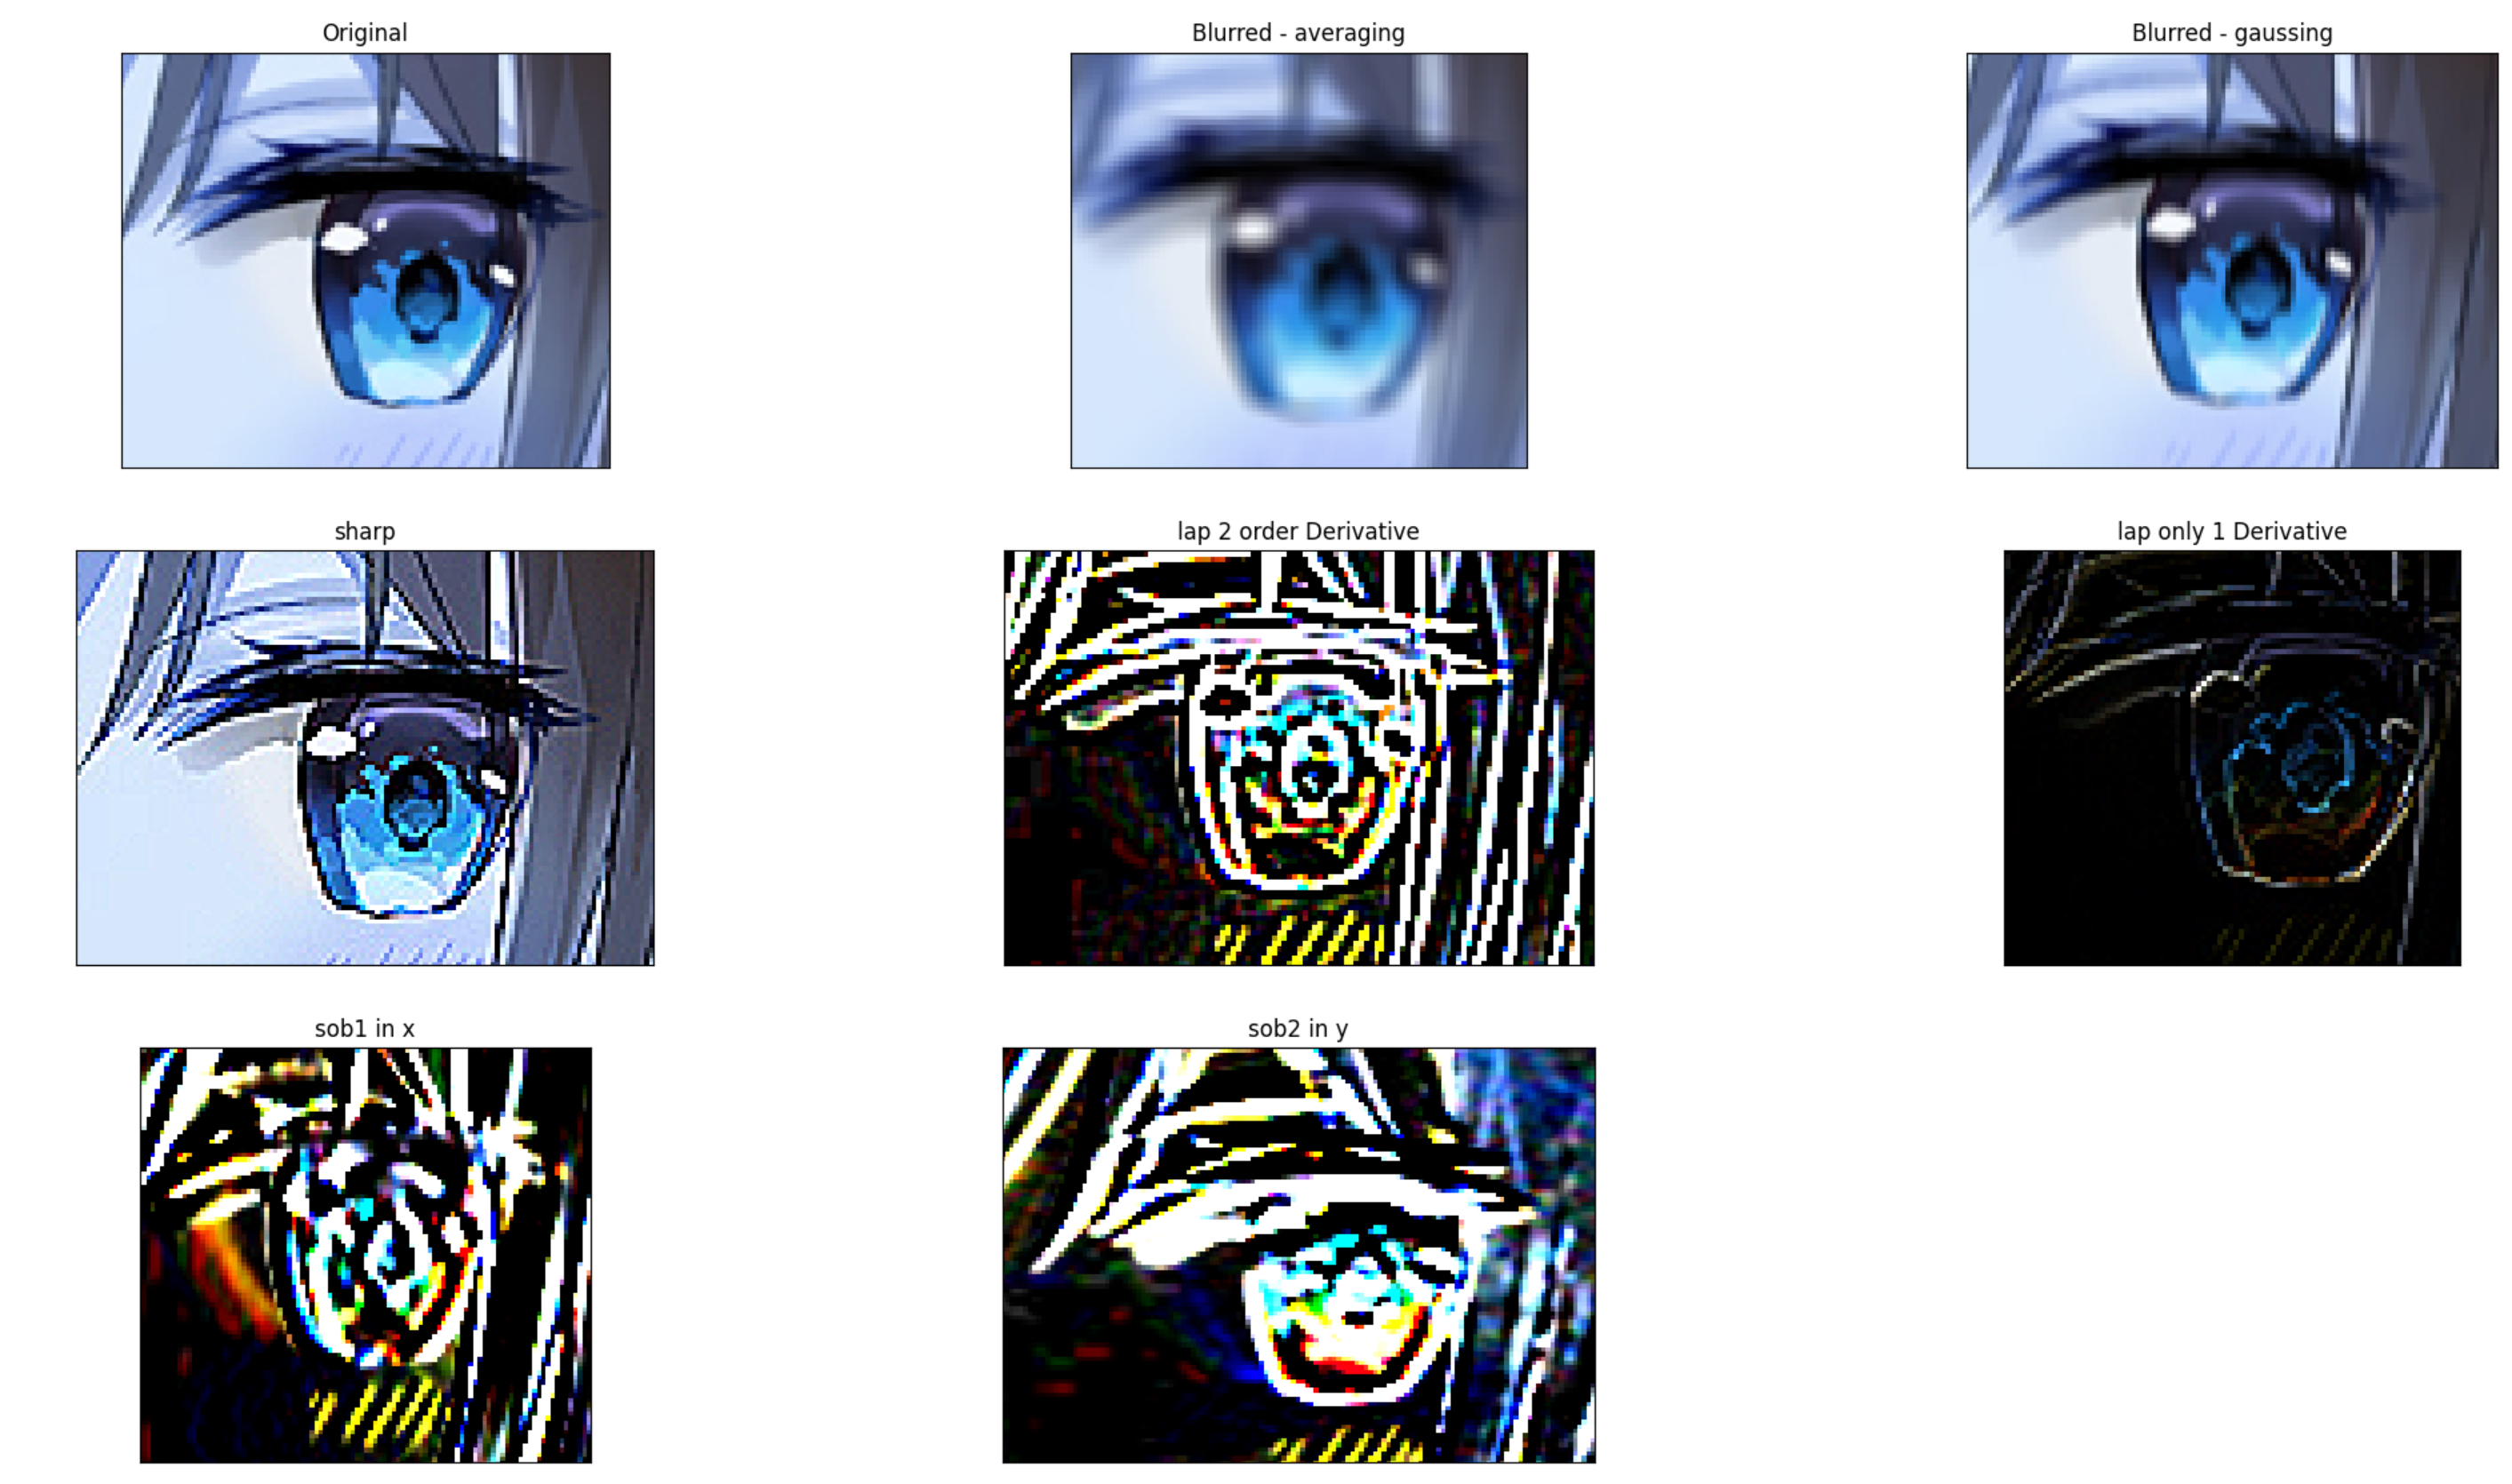
| import cv2 as cv
import numpy as np
from matplotlib import pyplot as plt
img = cv.imread('F:/myFiles/blogs/source/_posts/imageFiltering/index3.png')
avKer = np.ones((5,5), np.float32) / 25
blur = cv.filter2D(img, -1, avKer)
gKernel = cv.getGaussianKernel(3, 2)
print(gKernel[0:2])
blur2 = cv.filter2D(img, -1, gKernel)
sharpKer = np.zeros((3,3), np.float32)
sharpKer[0] = [0, -1, 0]
sharpKer[1] = [-1, 5, -1]
sharpKer[2] = [0, -1, 0]
print(sharpKer)
sharp1 = cv.filter2D(img, -1, sharpKer)
oneDKer = np.zeros((3,3), np.float32)
oneDKer[0] = [0, 0, 0]
oneDKer[1] = [0, -2, 1]
oneDKer[2] = [0, 1, 0]
sharp2 = cv.filter2D(img, -1, oneDKer)
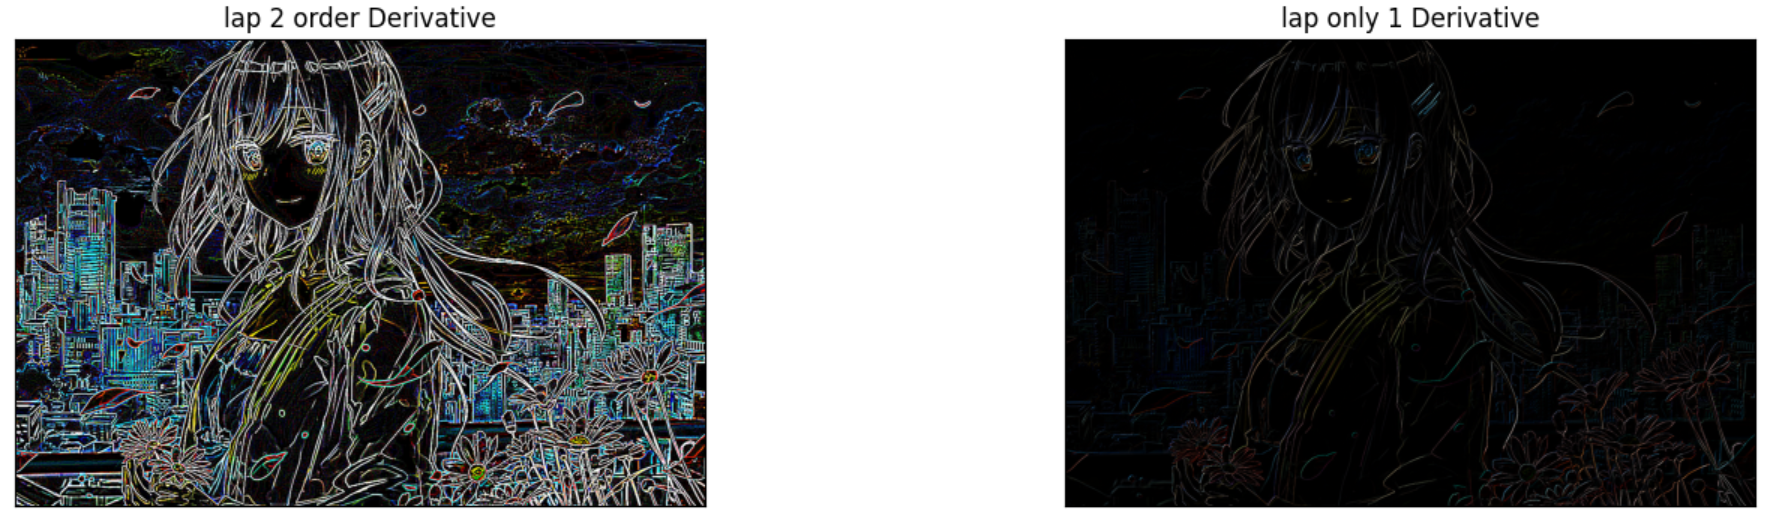
lap1 = cv.Laplacian(img, -1, None, 5)
sob1 = cv.Sobel(img, -1, 1, 0, None, 5)
sob2 = cv.Sobel(img, -1, 0, 1, None, 5)
plt.subplot(331),plt.imshow(img),plt.title('Original')
plt.xticks([]), plt.yticks([])
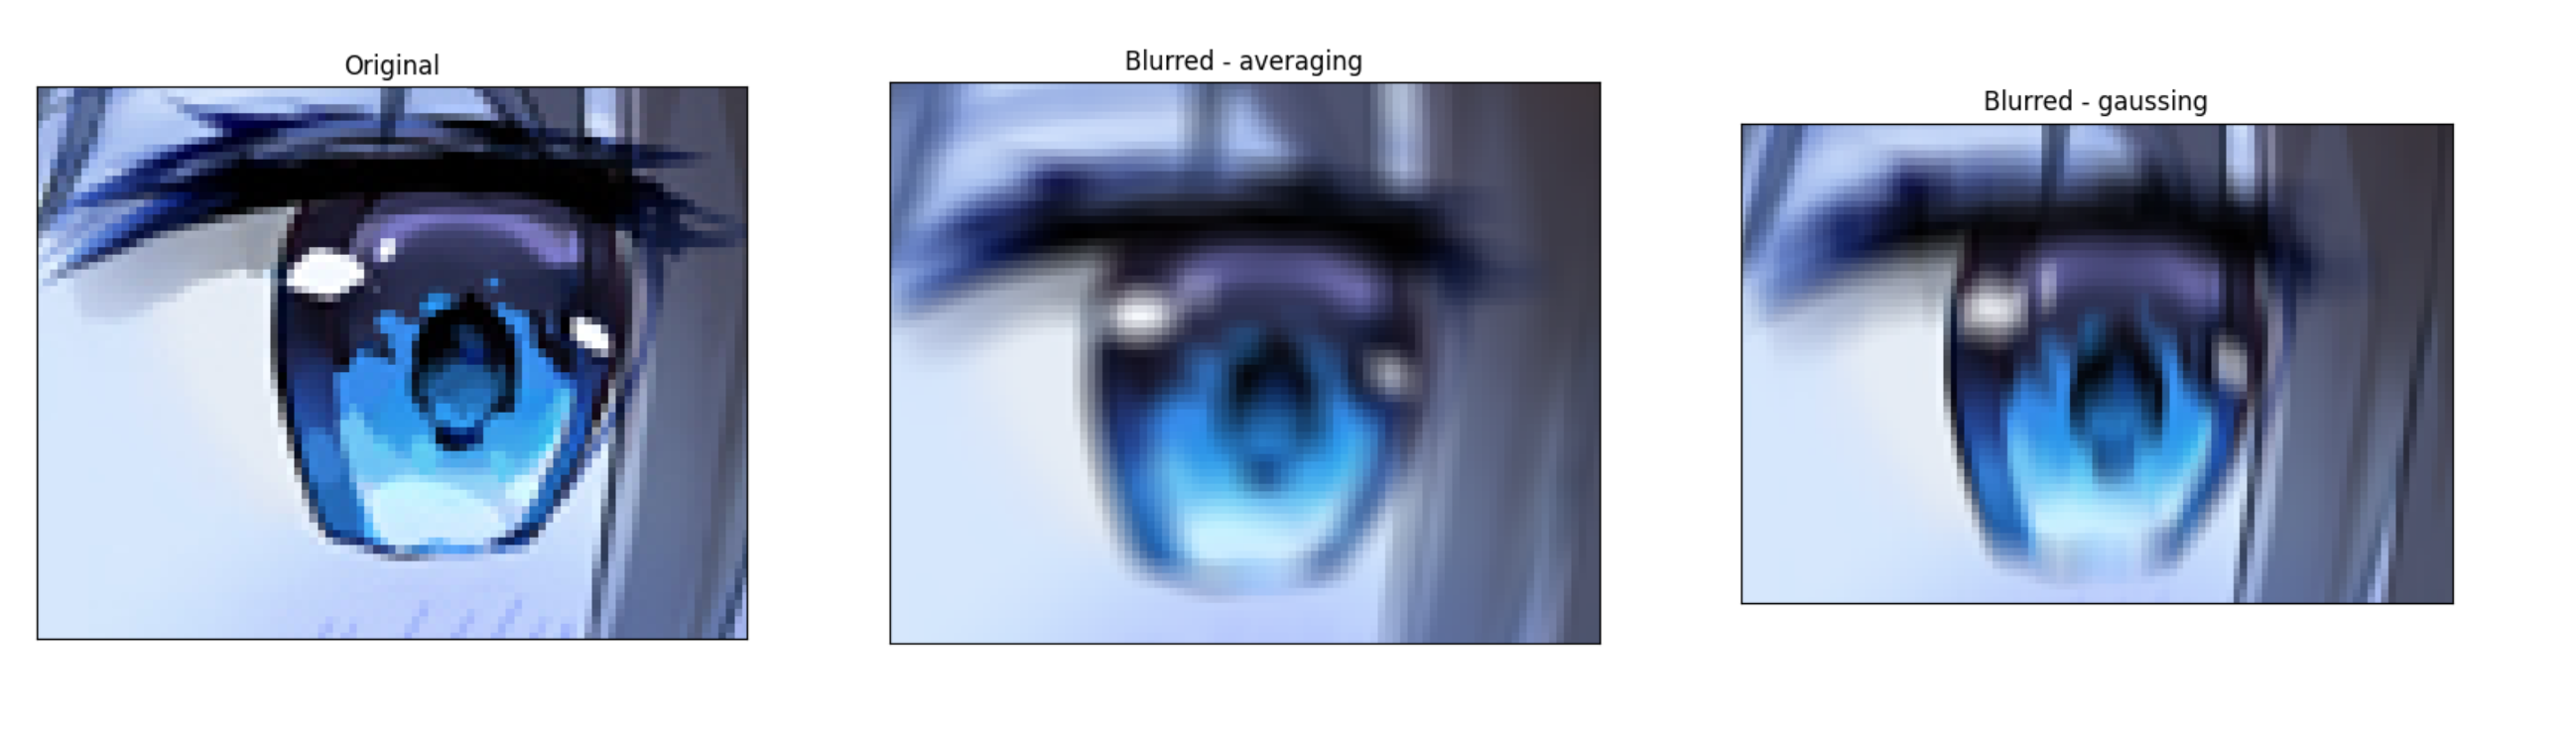
plt.subplot(332),plt.imshow(blur),plt.title('Blurred - averaging')
plt.xticks([]), plt.yticks([])
plt.subplot(333),plt.imshow(blur2),plt.title('Blurred - gaussing')
plt.xticks([]), plt.yticks([])
plt.subplot(334),plt.imshow(sharp1),plt.title('sharp')
plt.xticks([]), plt.yticks([])
plt.subplot(335),plt.imshow(lap1),plt.title('lap 2 order Derivative')
plt.xticks([]), plt.yticks([])
plt.subplot(336),plt.imshow(sharp2),plt.title('lap only 1 Derivative')
plt.xticks([]), plt.yticks([])
plt.subplot(337),plt.imshow(sob1),plt.title('sob1 in x')
plt.xticks([]), plt.yticks([])
plt.subplot(338),plt.imshow(sob2),plt.title('sob2 in y')
plt.xticks([]), plt.yticks([])
plt.show()
|