gpsToCartesian GPS坐标转WGS84坐标
1 cesium/source/core/cartesian3.js 经纬度转WGS84坐标代码:
直接去github看cesium的源码实现就行了:
1 | Cartesian3.fromRadians = function ( |
直接去github看cesium的源码实现就行了:
1 | Cartesian3.fromRadians = function ( |
1 | package com.soul.weapon.algorithm.annotation; |
注意注解的申明是用@interface来声明的:
然后这里对每一个参数做简单说明:
这3个生命周期分别对应于:Java源文件(.java文件) —> .class文件 —> 内存中的字节码。
明确生命周期长度 SOURCE < CLASS < RUNTIME ,所以前者能作用的地方后者一定也能作用。一般如果需要在运行时去动态获取注解信息,那只能用 RUNTIME 注解,比如接下来要讲到的在运行过程过获得某种注解的所有的类;如果要在编译时进行一些预处理操作,比如生成一些辅助代码(如 ButterKnife 和 mapstruct 等),就用 CLASS注解;如果只是做一些检查性的操作,比如** @Override**和 @SuppressWarnings,则可选用 SOURCE 注解。
简单说明一下,比如你有一个业务要求是,实现n种车的drive方法,那最普通的就如下:
分别实现其类然后调用,这未免有点难看:
1 | public class Driver1 { |
使用简单工厂模式就是说,来一个carFactory类,我所有车的实例的创建和使用都通过carFactory,然后传具体的参数就能实例化相应的类:
1 | public class Driver2 { |
但是这里有一个问题,没有遵循开闭原则(开放扩展,关闭修改的原则),那么造成没有遵循的原因是什么?因为每一个实现的类的名称是我们手动写到代码里的,当这些相关的类的名称是我们通过代码可以获取的时候,我们就可以解决该问题了,于是我们使用注解
接着上面#1的注解,一个策略模式的例子如下(个人理解,欢迎交流)
1 | public interface Algorithm { |
1 |
|
1 | public class AlgoFactoryContext { |
1 | AlgoFactoryContext ctx = new AlgoFactoryContext("airMissilePipeTest"); |
1 | public interface Algorithm { |
1 |
|
1 |
|
1 |
|
改过程假设照片中物体的lambertian光照环境,R(p)是reference image的意思
$$g(p) = \frac{1}{|V(p) / R(p)|} \sum_{I \in V(p) \ R(p)}^{} h(p, I, R(p))$$
h(p, I, R(p))是光学差异函数,需要选择出那些满足低于阈值 α 的I然后组成V*(p):
$$V^*(p) = { I | I \in V(p), h(p, I, R(p))aa \leq \alpha) }$$
替换掉2-1中的V(p)即可,相当于对图像做了一个过滤,得到:
$$g^*(p) = \frac{1}{| V(p)^* / R(p)|} \sum_{I \in V^*(p) \ R(p)}^{} h(p, I, R(p))$$
每一个patch重建需要2步
基于patch去做表面展示的最大优点是很灵活,然而缺少patch与patch之间的链接信息,就不容易获取相邻的patch,解决办法如下:
对于每一张图片,划分成 ββ(β=2在文中)的cell,然后对于每一个patch,它在每个可见图片上都有映射过去的cell,然后上述过程做完以后,每张图片的每个cell都记录了该cell可见的那些个patch,我们记作$Q_i(x, y)$, 同样的,如果是在每个可见图片而且满足#2-3定义的光学差异进行上述步骤,那么就得到$Q_i^(x, y)$
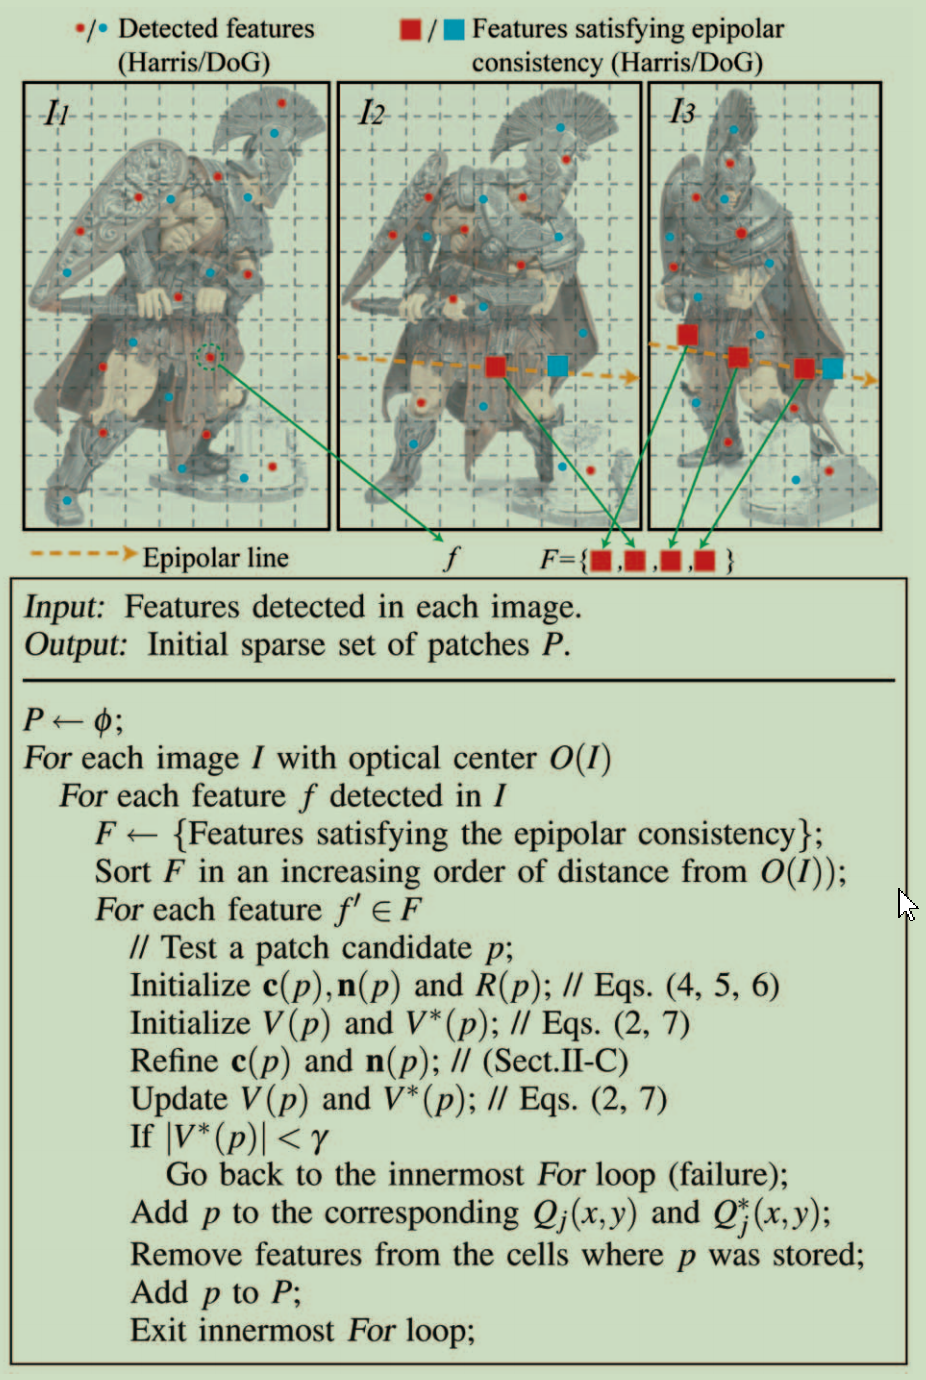
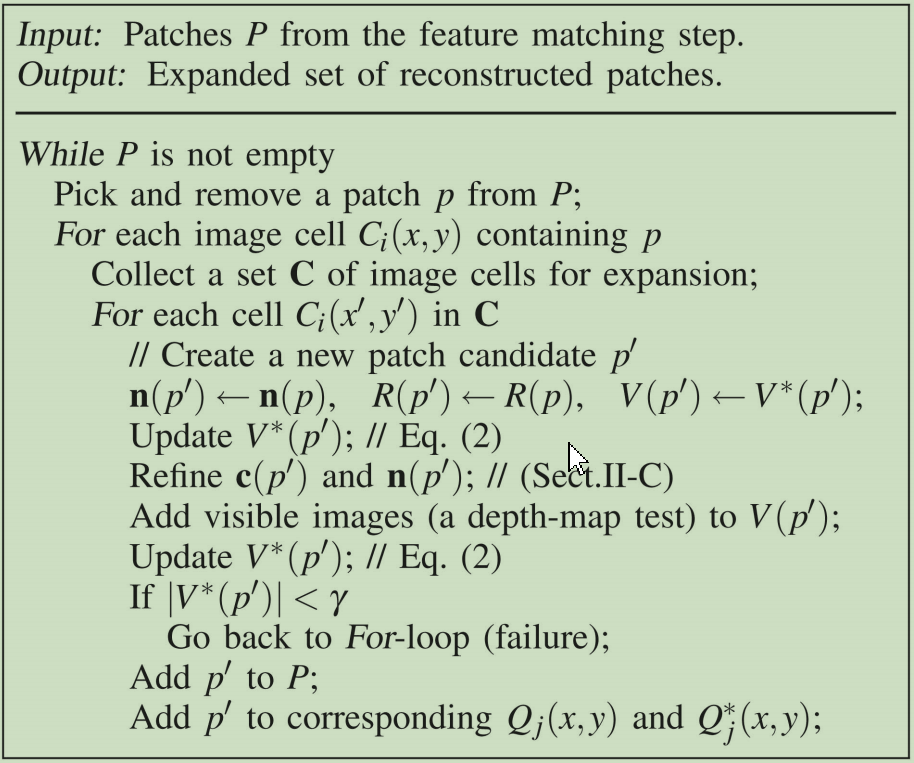
对于一个p,其在它的第i张可见图片中,而且被$C_i(x, y)$格子记住的patch集合$Q_i(x, y)$中,然后相邻的cells如下获得:
$$C(p) = {C_i(x’, y’) | p in Q_i(x, y), |x - x’| + |y - y’| = 1}$$
C(p)中需要移除两种类型的cell
<未完待续>
| 命令 | 说明 |
|---|---|
| docker search myphp | grep admin | 搜索镜像 |
| docker pull mysql:latest | |
| docker run –name myMysql -it -d -p 30000:3306 -e MYSQL_ROOT_PASSWORD=123456 mysql bash | -it: 进入终端(tty), -p 端口映射: 本机到容器, -d后台运行 |
| docker ps -al | 查看镜像 |
| docker rm -f 4e14 | 停止并完全删除镜像 |
| docker logs -f –tail 50 myMysql | 查看日志 |
这里给一个运行mysql的例子:(gitbash中运行)
1 | docker run -d \ |
1 | version: '3.7' |
1 | version: "3.7" |
1 | docker-compose up -d |
std::ref的说明: Constructs an object of the appropriate reference_wrapper type to hold a reference to elem.
其实主要是,如果要向thread传参的时候,该参数在线程内会被修改,需要用这个ref作为一个wrapper将对象包裹成为一个引用然后传入。
1 | void main() { |
1 | ffmpeg -i DJI_20210615164633_0003_W.MP4 -r 3 images/%4d.jpg |
对于其他的例如static_cast<>等的应用,参考:http://www.cplusplus.com/doc/tutorial/typecasting/
以下引用自: https://stackoverflow.com/questions/573294/when-to-use-reinterpret-cast
Here is a variant of Avi Ginsburg’s program which clearly illustrates the property of reinterpret_cast mentioned by Chris Luengo, flodin, and cmdLP: that the compiler treats the pointed-to memory location as if it were an object of the new type:
1 |
|
Which results in output like this:
1 | as->i = 0 |
It can be seen that the B object is built in memory as B-specific data first, followed by the embedded A object. The static_cast correctly returns the address of the embedded A object, and the pointer created by static_cast correctly gives the value of the data field. The pointer generated by reinterpret_cast treats b’s memory location as if it were a plain A object, and so when the pointer tries to get the data field it returns some B-specific data as if it were the contents of this field.
应用如下:
下面的应用根据输入的类型T判断后使用了reinterpret_cast去转换;
1 | template <typename T> |
项目地址:
git@github.com:xychen5/tryGlog.git
推荐使用类似于clion的ide,然后打开该项目,即可编译运行。
能够将glog的日志在cmd中打印
主要调用了函数:
1 | google::SetStderrLogging(google::INFO); // print the logs whose severity > [info] |
样例输出代码如下:
1 | I0718 16:09:07.626883 18628 main.cpp:13] glog used in cmd!! |
如果使用x86版本的toolchain,会报错如下:
1 | ====================[ Build | tryGlogLion | Debug ]============================= |
解决方案:
将files->settings->buidl,execut,deploy->toolchains->enviroment->architecture设置为x86_amd64
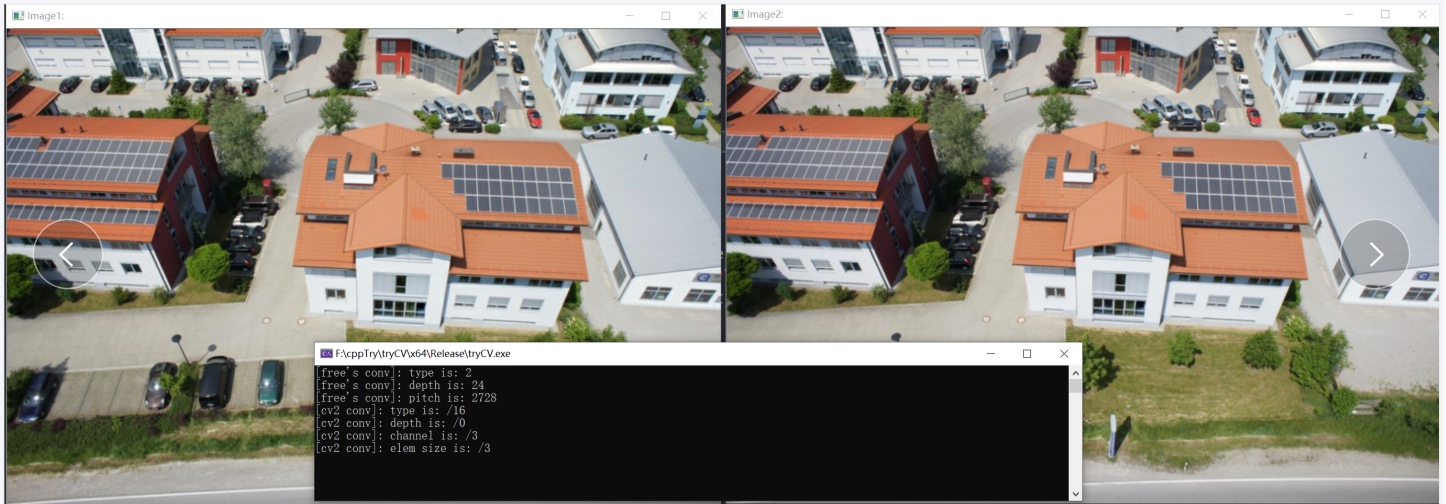
将freeImage转为cv::mat,代码如下:
1 |
|
1 | void convert1to3Channel(cv::Mat& src, cv::Mat& dst) { |
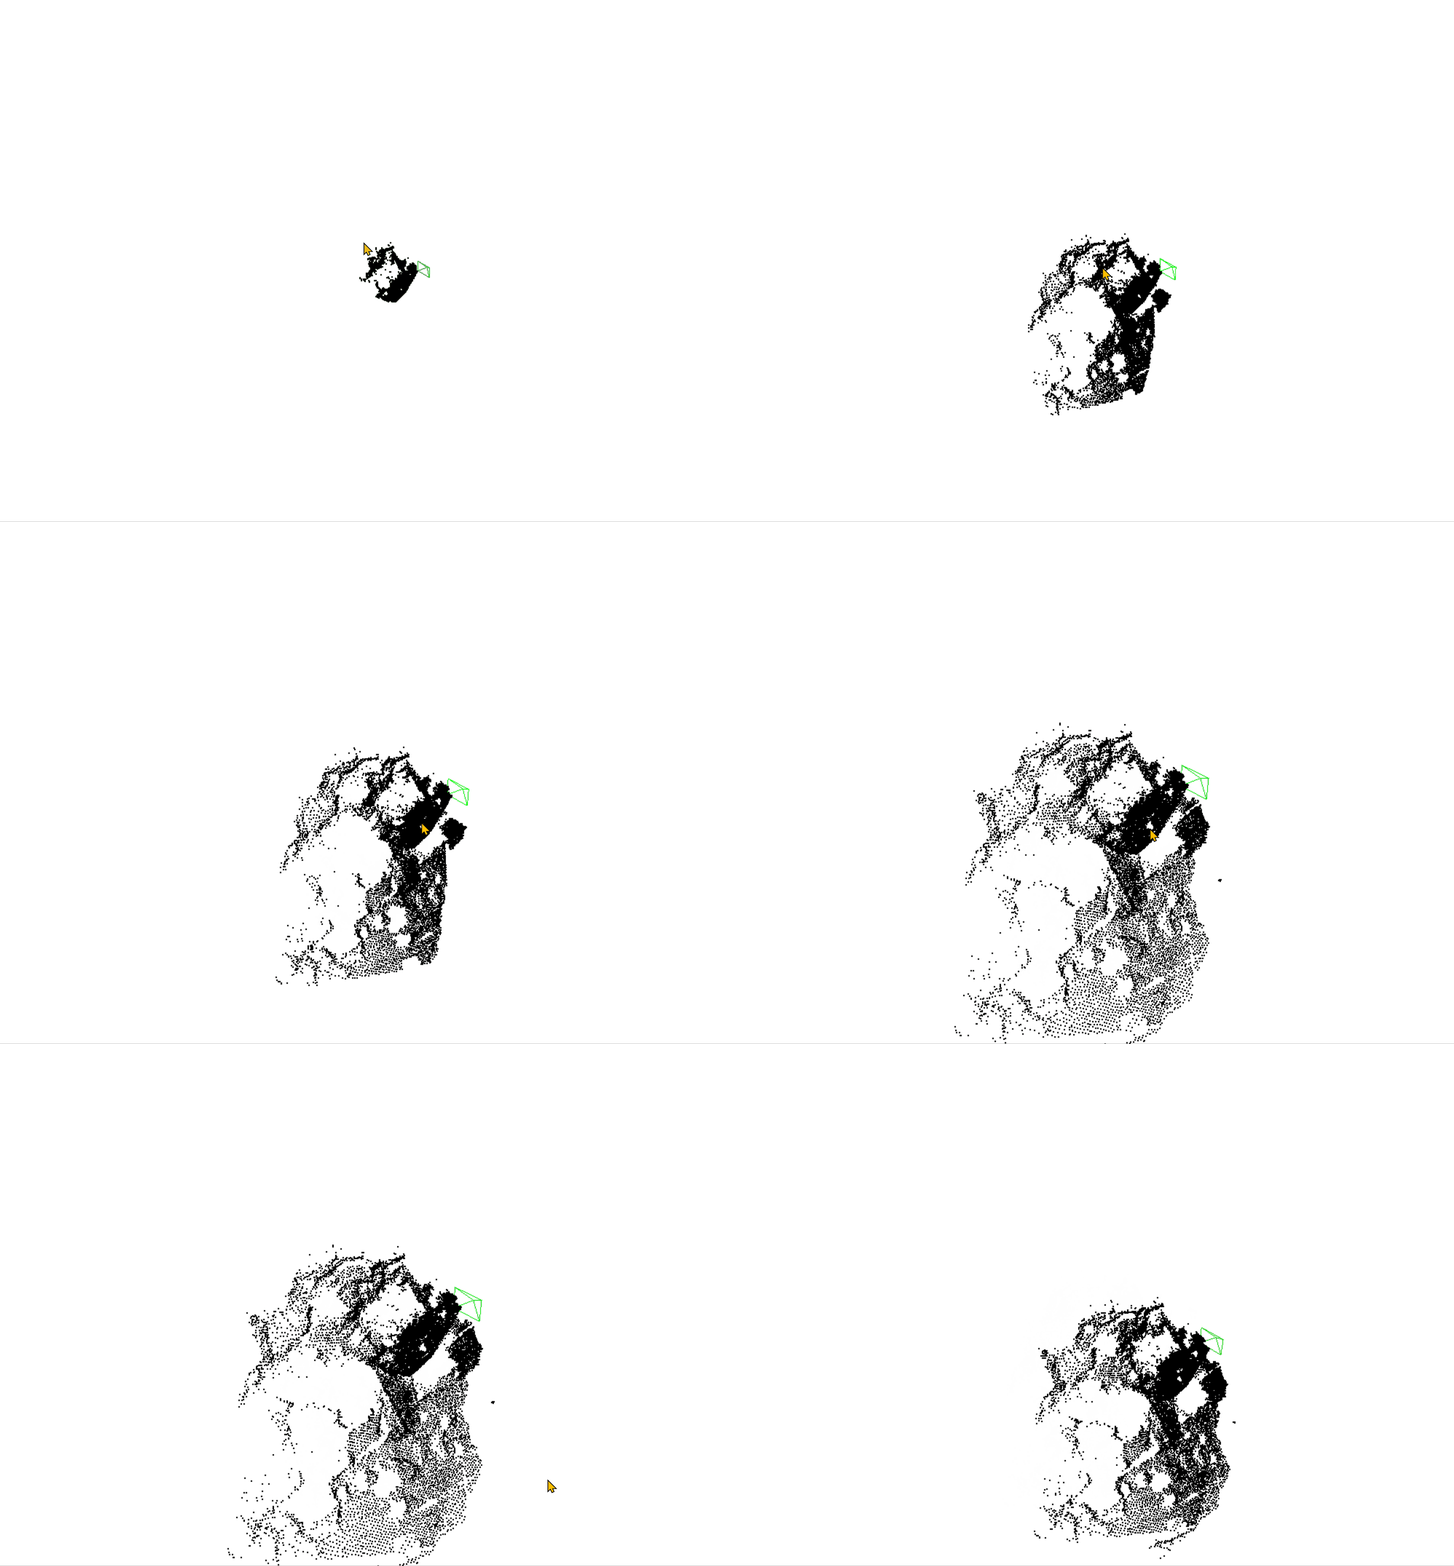
https://github.com/stevenlovegrove/Pangolin.git
该库中本身含有libpng, libjpg, libzip
调用时依赖如下:(本项目并未上传所有依赖,部分依赖需要单独下载然后放到thirdparty目录里)
1 | # include |
1 | void viewThread(pangolin::OpenGlMatrix &Twc) { |
类的定义如下:
1 | class QOsgWidget { |
类的析构函数如下:
1 | QOsgWidget::~QOsgWidget() { |
问题描述,在执行类的析构的时候:
当没有PART1的时候,直接执行pWidget会出错